Followers

Showing posts with label FOTD. Show all posts

Tuesday, September 10, 2013

 Hey all ~~
I purchase Luna Apocolips when I was in UK. I don't think Australia has this shade I'm afraid, I haven't seen it in priceline or any thing. This is a lovely peachy/orange shade something that I'm obsessed with. just ordered The Balm's Frat Boy blush too. was tossing between that one or Mac's Melba. any ways.


 So the product comes like a lipgloss but its a liquid lipstick. its none sticky. the colour is really opaque. covers your natural lip colour. but ofcourse you can apply sheer and blend it out. gives you that coral lip really nice. I like the texture the colour. the only thing is it doesn't stay very long on my lips even when i don't eat or drink. so have to reapply many times.

 So here's some swatches. the top applied sheer, bottom applied thick. so photo above is with flash.

Photo above taken in natural indoor lighting. I think this can be used as blush as well. It's got that creamy consistency. so if you apply it sheer it can be a multi purpose product blush and lippie in one.


Here's a photo of me using Luna, hope you enjoy your apocolips too. if you haven't tried them, highly recommended.

Sunday, November 4, 2012

Rimmel London Kate Moss lipstick in #20

 Hey all ~~
Just wanted to share a bright lipstick I recently bought. It is the new kate moss lipstick in #20 from Rimmel London. It is really really bright pink. I was just wanting to try it out but it is really attention grabbing.


 This is what the lipstick looks like and a swatch down below.

The texture is really creamy and smooth. and the pigmentation is really great. super opaque just one swipe you get a really good colour pay off. I think the quality of these lipsticks can match high end ones. and it comes only at a fraction of a cost.

Here's what it looks like on lips. I used Mac's Gentle mineral blush to match the colour of the lipstick as they both have that purple undertone to it.


It is really bold. I think may be only wear it out at night because during day time it is too much for my taste.

hope every one have a great week.

Tuesday, October 30, 2012

[] In this summer ~~~[]

 Hey all ~~
Summer time again. So I digged out previous year's summer loves.
just a simple FOTD.. ready for summer except this year I think I will wear lots of hats, sunscreens and keep out of sun because it makes my skin worse I think.


 Here's a list of things I used:
- Bourjoise 123 perfect foundation in 52
- Laura Mercier Mineral Foundation in realsand
- Nars Laguna Bronzer
- Mac stereo rose MSF
- MAC brow set in beigule
- Bobbi Brown lipstick in soft coral


 and a picture with my favourite hat.....


That's all for today... a quick update. A Blog sale coming up soon.

have a great week every one..... happy working. ~~~


Saturday, October 20, 2012

[] FOTD - Illamasqua Complement Palette~~[]


 Hey all ~~
hope you had a fantastic weekend. It was beautiful out side yesterday (Saturday) lovely weather. but today is cloudy and windy, a bit chilly so decided to stay home and update my blog post ^^. So here I am ~~


 I know it is Spring now in Australia, but I am really not looking forward to  Summer. I prefer Autumn. So this eyeshadow palette is perfect for autumn, it gives that brown plummy look totally wearable for every day.


 So here's a list of things used for this look:
Face:
- Clinique even better foundation (been using this every day)
- Nars Laguna bronzer
- Nars Oasis blush (love this blush for autumn winter)
- Rimmel Stay matte powder (transparent)

Eyes/Brow:
- Illamasqua Generation Q eyeshadow palette
- Kiss me Heroine eyeliner (liquid)
- Active girl mascara
- MAC brow set in beiguile

Lips:
- Mac Craving lipstick ( LOVE this lipstick !!!)


 Here's another look at the palette, I love the plummy brown eyeshadow. the dark purple one is really nice too.
 Here's the swatch:(left to right)
- Queen of the Night
- Slink
- Focus (liquid metal)
-Forgiveness


 Here's what it looks like: So I used Slink in the inner corners, and brow highlight. Used Focus all over the eyelid for a wash of colour and a base. then I used Forgiveness all over the lid and also all over the lower lashline. Then Queen of nights on the 1/3 outer corner of the eyelid to darker it up. apply the eyeliner and mascara and you are done.


 So here's what it looks like finished. I extended my eyeliner out a bit.


 Need my glasses to see any thing. hahah ~~


Hope you like this look. take cares all have a great weekend. ~~~


Tuesday, August 21, 2012

[] Stila Lovely in London Travel Pallete Review & FOTD[]~~

 Hey all ~~
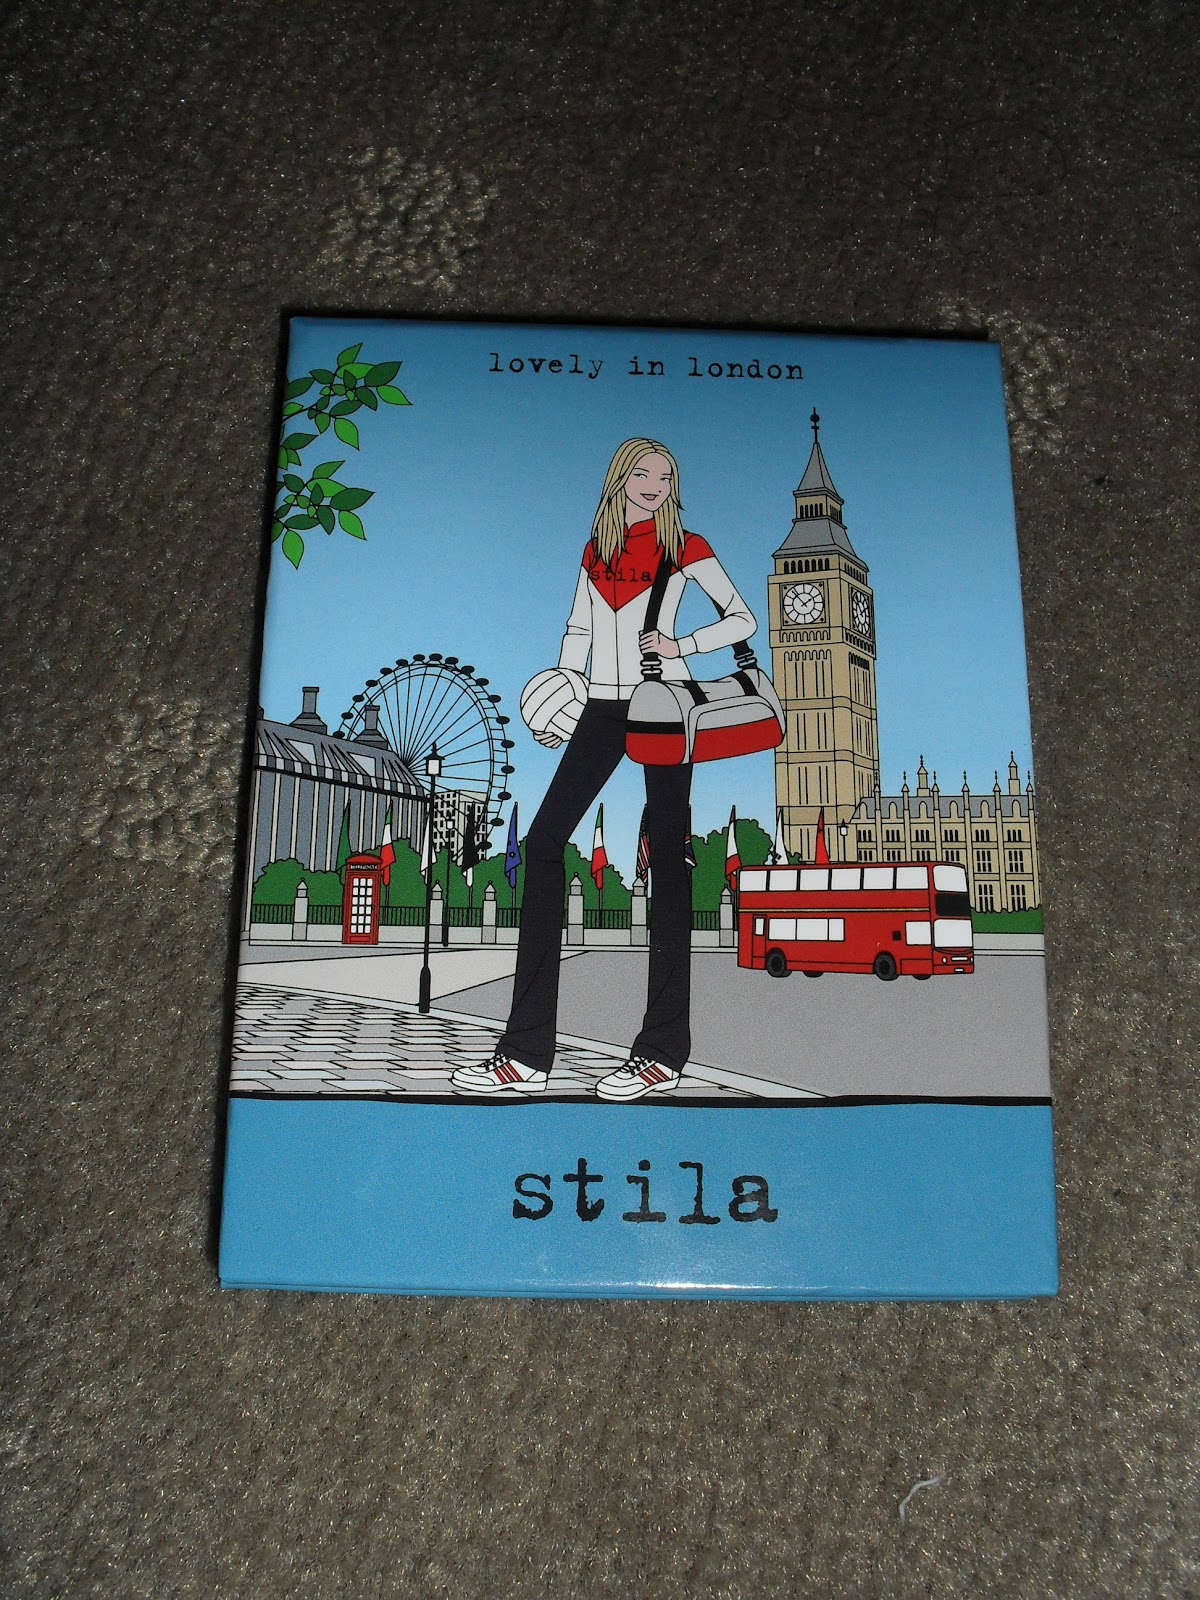
I bought the Stila Lovely in London Travel Palette, because the colour really attracted me also the cute packaging. last year I got the Stila travel palette in Haute in the Hamptons. Click HERE to see the review for that.

 So the palette is a bit different to other palettes last year is that it flips open vertically. instead of from right to left like a book. but I don't really mind that.

This is what the front looks like.


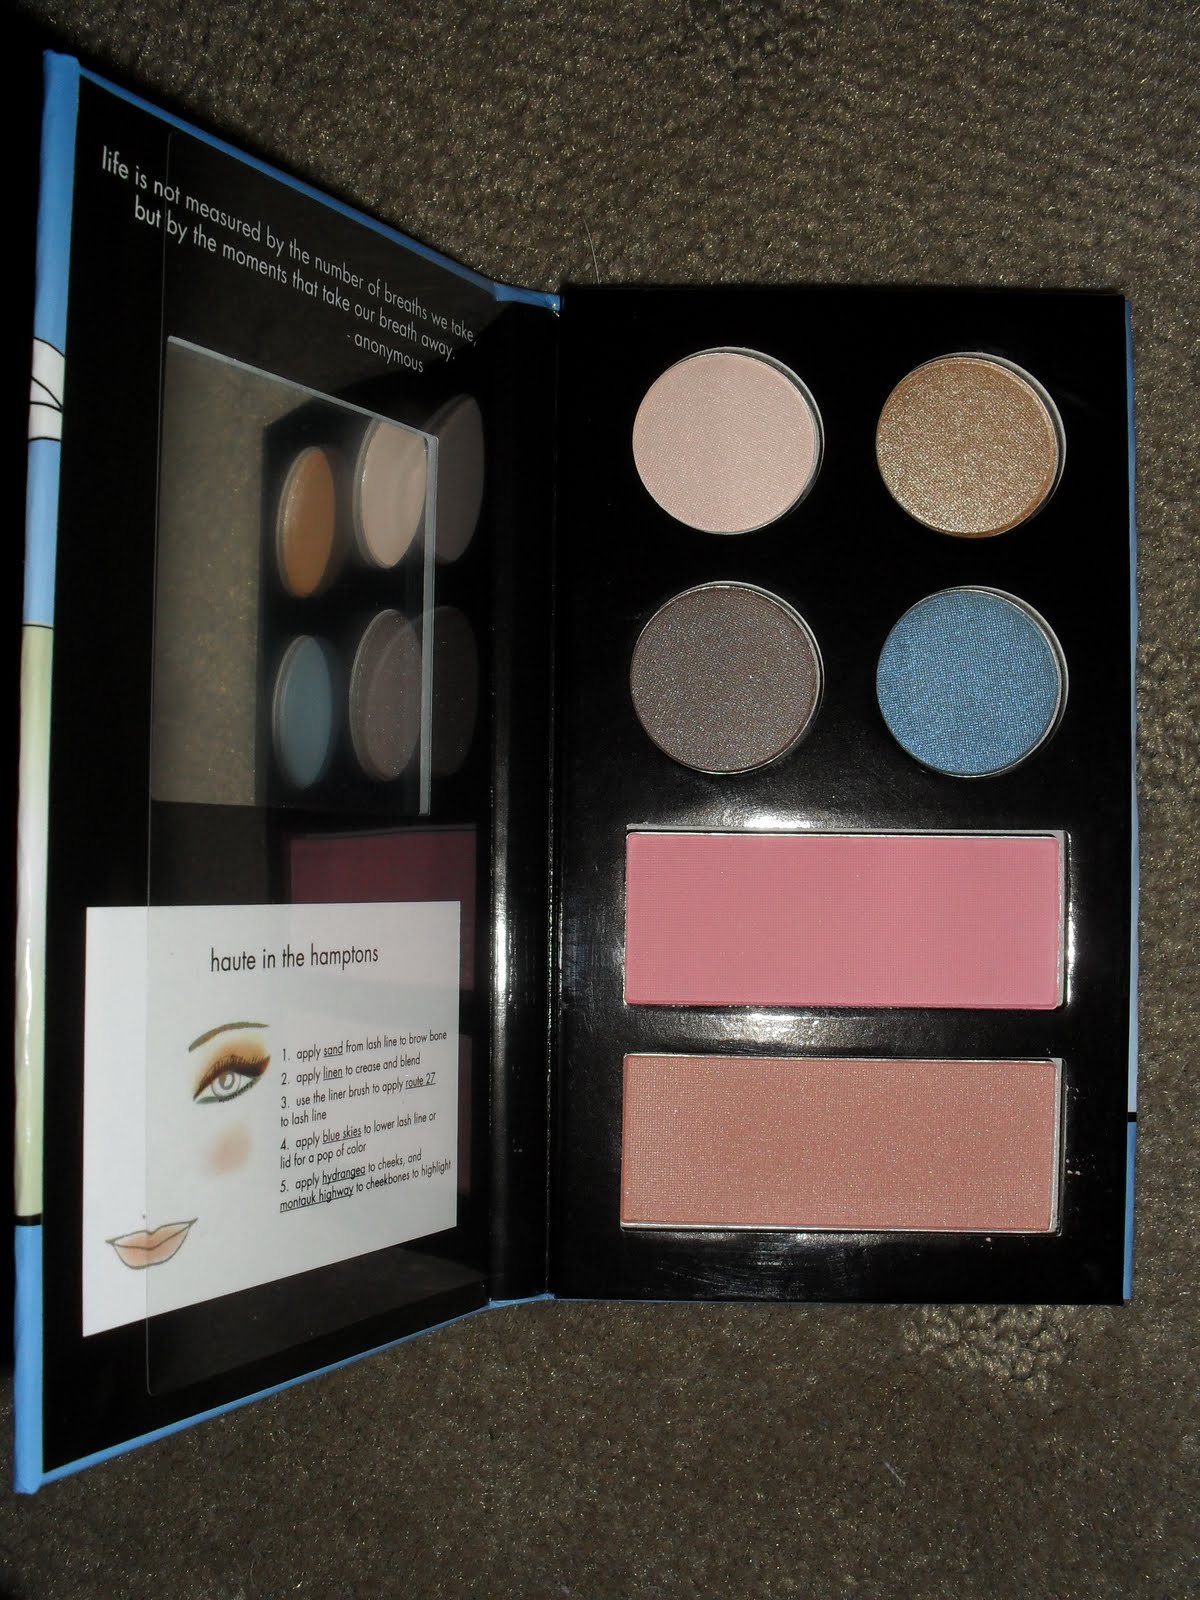
This is what the colours look like. you got 5 eyeshadow colours and 1 cream covertible colour for lip and cheek. eyeshadow colour:
top = Notting Hill
left = Tower Bridge
right = Duchess
bottom = high street
middle = castle


So for the swatch, top light pink colour is the primrose cream convertible colour.
Then the darkest brown is high street.
then last row from left to right is castle, notting hill, tower bridge and duchess, all colours are matte, except for duchess which is a pearly colour.

For today's FOTD, I used these products:
- Sofina Primavista Perfect Fit foundation in 03
- Nars Laguna bronzer
- Bare Minerals Rose Radiance (as blush) over Primrose
- Urban decay primer potion
- Prestige waterproof eyeliner in black
- Active Girl full long mascara
- Mac Modesty lipstick
- Mac brow gel in begiule
- Stila Lovely in London Palette

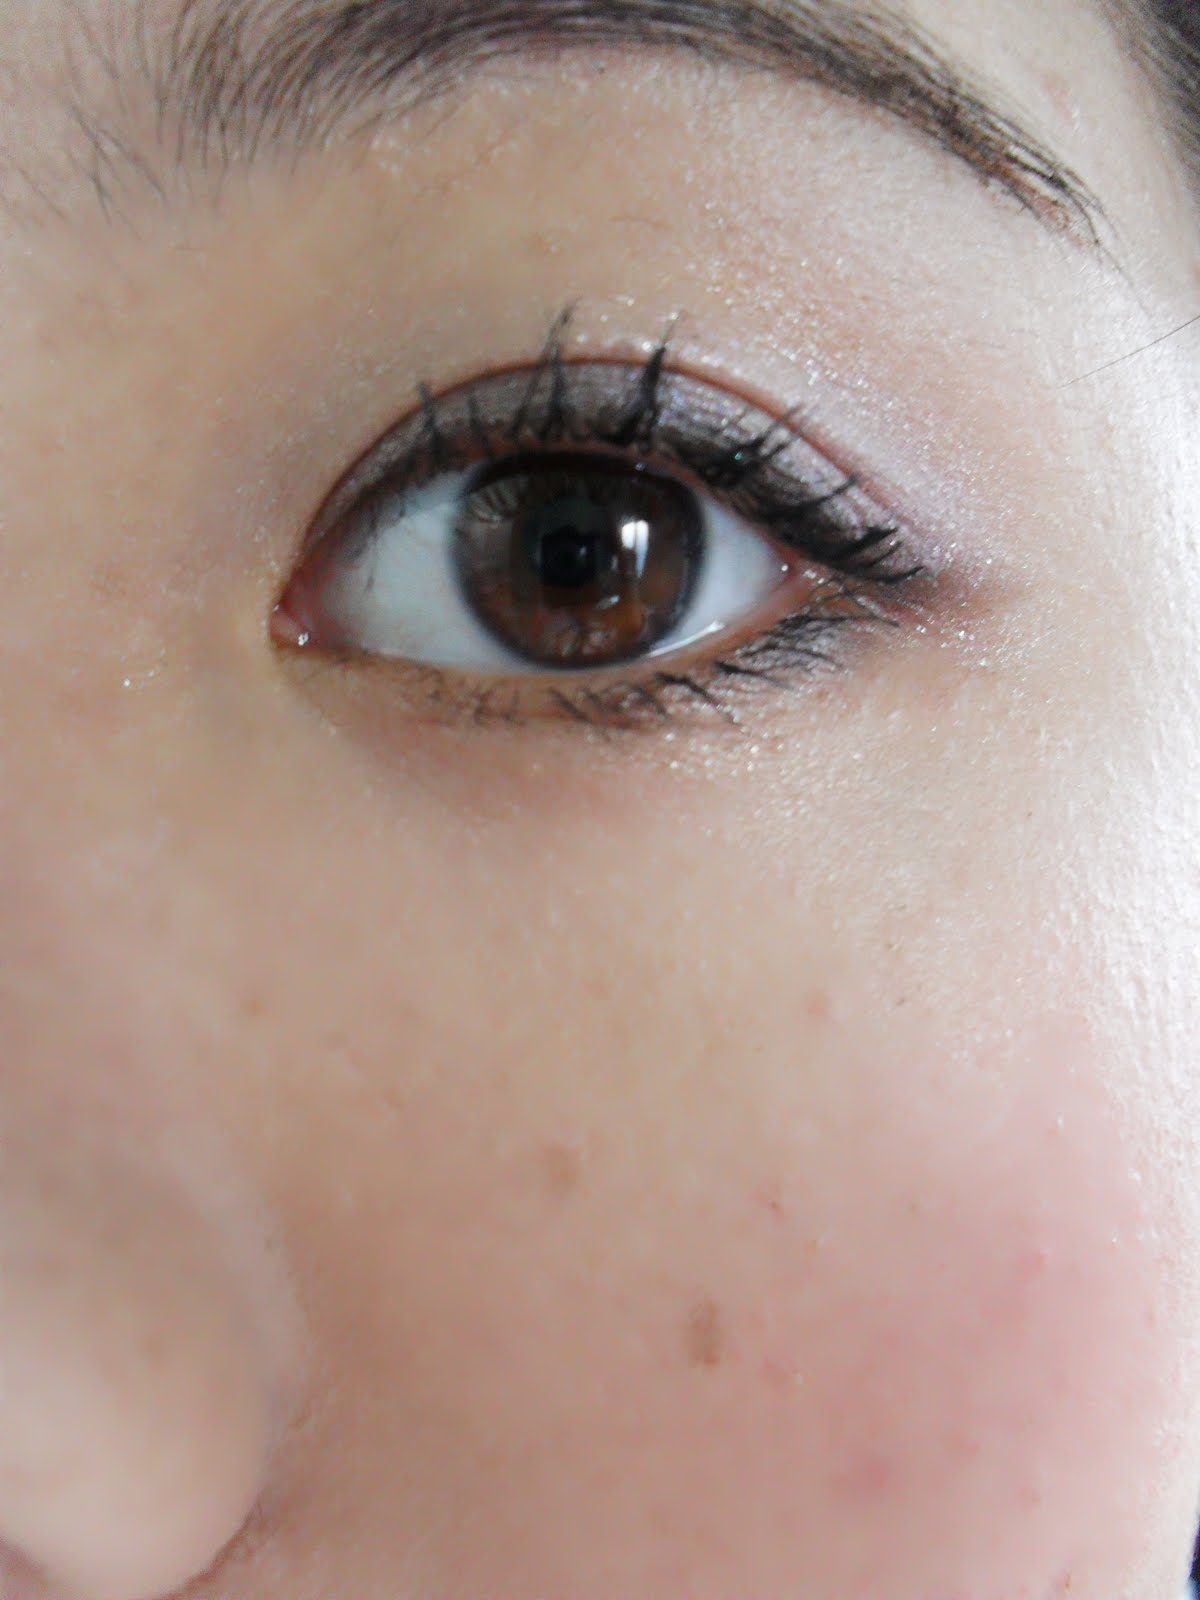
So here's what the eye makeup look like.
- used castle all over the lid up to the brow bone
- then notting hill up to the crease
- duchess in the first 1/3 of the top eyelid
- used tower bridge all the way in the lower lashes.
- then used high street as an eyeliner colour for top lid and 1/3 in the outer lower lash
- applied black eyeliner pencil
- top off with mascara and done.

The photos are taken in natural in door lighting. excuse the not groomed eyebrows.
It is actually a really autumn colour, because it's so brown and coppery. I really like it. could be used in summer if you add a bit more gold. I think it suits warm skin tone really well. The primrose convertible colour is  a bit too light for my skin tone. I didn't like it on my lips. on my cheeks barely showed up.


here's my normal look with glasses.

I highly recommend you go out there and buy this travel palette, for $16, and it's worth it I think.

Have a great week every one.
P.S. recovering from a cold.

Friday, August 17, 2012

[] Gun metal Grey Obsession[] ~~

Hey all ~~~
I am obsessed with this Gun-Metal Colour. a bluey/metallic grey. I think it's such a cool colour where it changes with different lighting. I recently picked up the Benefit crease less cream shadow in Busy Signal and Strut. Busy Signal is a coppery brown colour, where as Strut is the gun metal blue. It can be used as a shadow or eyeliner.

The quality is amazing. I find it better than Mac's Paint pots, and also it lasts on my eyelid without creasing as much as MAC PP. but the product will dry out if you didn't tighten the lid. so I wanted to try this out with a FOTD just to see how it turned out.


 List of Items I used for this look:
- Princess Eye Lashes, hand made from taiwan in number 7
- Duo eye lash glue
- Sofina, Primavista powder foundation in Ochre- 03
- Nars Laguna Bronzer
- Bare Minerals Rose Radiance all over face colour
- Urban decay naked palette
- Benefit crease less cream eyeshadow in Strut
- Mac brow set in Beigule
- Mac Craving lipstick
- Prestige waterproof eyeliner in black
- Urban decay primer potion
- Maybelline Colloso Mascara( forgot to put in the picture)
 Above: taken under natural indoor lighting

Here's some swatches:
- top is Bare Minerals Rose Radiance as blush
- Urban decay Sin all over the lid
- Urban Decay Gun Metal in the crease
- Benefit Strut as base.
- Mac Craving lipstick


 Above: photo taken with flash
 Here's what the whole face looks like. I think it's quite dramatic. Probably an evening look too much for me during the day.

 A closer look at the ye make up. The eye lashes looks quite natural. not as dramatic as I though.
The colour is more dramatic in real life.
Probably get more use out of Busy Signal even though strut is such a pretty colour I feel like it is too cool toned for my warm yellow toned skin. What do you all think?

Have a great weekend every one ^^


Saturday, December 10, 2011

[] Summer every day FOTD[]~~~

Hey all ~~~
it is getting closer and closer to Christmas every day.. I'm so excited.. can't wait !!!!

Just wanted to do a FOTD for summer.. .. this look isn't suitable for going to the beach.... things used aren't waterproof.


Here are a list of things Used for this FOTD:

Face:
- Bourjois Healthy Mix foundation for a natural glow in 52
- Laura Mercier Mineral Powder in Real sand
- Nars Laguna Bronzer (for contour and all over glow)
- Mac Springsheen blush ( perfect glow on the cheek)
- Benefit High Beam (highlights.)

Eyes/Brows:
- Lavshuca brow set in LB-1
- Mac Powerpoint liner in Duck
- Maybelline Collossal Mascara (black)
- Urban Decay Naked Pallete
( Sin - for highlight in the inner corner of the eyes )
(Toasted - all over the lid a bit past the crease, bottom of the eye)
(Hustle - outter corner of the eyes, and the outer 1/3 of the bottom of the eyes)

Lips:
- Bobbi Brown color rich lipstick in Soft Coral (then blotted with a tissue)

sorry about the messy hair.. T___T

well since it's summer FOTD.. this is how I go out normally on a summer day to a picnic, outting with bf, and other activities in the sun. ~~

I LOVE THIS HAT!!!.. hehehe also SOOO in love with soft coral lipstick.. just addicted........
very flattering for warm skin toned girls.. ~~~


and another photo..~~

Hope every one had a great weekend.... sigh Monday soon again..

take cares until next post. ~~~

Saturday, September 10, 2011

[]Lunasol three dimensional eyes 03 -FOTD~~[]

Hey all~~~~
I went out yesterday and I couldn't wait to try the new Lunasol Three Dimensional Eyes palette so I did a quick FOTD. I was going for a more natural/subtle look so nothing dramatic.

I thought the pallete would be really shimmery but it turns out really pretty not over glittery like my Lunasol CORAL CORAL palette.......... I don't think my camera is doing any justice though.


Here a list of things I used for this FOTD:
- Cezanne powder foundation. I just did a review for this.
- Nars Laguna bronzer
- Mac Fleur Power blush
- Mac powerpoint eyeliner in Duck ( brown)
- Lavshuca brow set LB-1 ( forgot to take photo)
- Canmake brow gel in 03 ( forgot this one too)
- Maquillage eyelash curler (sigh..... forgot this one as well)
- Too Faced shadow insurance
- Kiss me Heroine mascara (volume and curl)
- Lunasol Three Dimensional Eyes in 03
- Estee Lauder lipstick in Crystal pink (old formula and packaging)


This is kind of like a semi tutorial post too. I tried to show the steps of how I used the palette, but I don't think it's any help though. sad.................. T__T

Pictures taken under natural indoor bathroom light. (No flash used)

First: Apply shadow insurance then Curl your lashes......... Apply the mac powerpoint eyeliner. Doesn't matter if it's messy. And kind of extend the outer corner a bit. I didn't wing it out. Also apply 1/3 of the outer corner of the lower lashes.
Apply the top right colour all over the lid as a base.
then apply the purple 1/2 of the lid blending upwards.
then use the brown from the palette to trace over the eyeliner you draw before. extending the corner and you can make a wing if you like. Using eyeshadows to make a wing makes it more natural than using eyeliners.
Take the white from the top left, apply it to the brow bone.
Apply Mascara and your done.
This is what it looks like quite subtle shimmery look. but my camera doesn't do the justice of showing the colour and how pretty it looks in real life.

and here's a finished look.......... Nothing dramatic. keep it natural...... ^^but I do have to say... this looks very springy although the collection is promoting a autumn/winter season......


Hope every one is enjoying their weekend.......

Saturday, August 27, 2011

[] Stila Haute in The Hamptons Beach Palette & FOTD[]

Hey all ~~
Haven't done a FOTD for a while. I purchased the Stila Haute in The Hamptons Beach Palette on Ebay for about $17.00 USD. The reason why I was so drawn to this pallete is because Rouge Deluxe, She did a look using this palette and it looked amazing.

Click []HERE[] to see her post.


This is what the cover looks like. very holiday summer feel. Wish summer was here quicker.

This is what it looks like inside, it has a mirror, instructions as to how to use the colours. Contains 4 shadow colours, 1 blush and 1 bronzer/contour colour. though I find both colours can be used as blush. because the bronzer colour isn't dark/brown enough.

Here's a closer look for the instructions.
Here's what the back looks like, has the name to all the shades.
So the lightested is called SAND, the golden colour is called Linen. The dark brown is called Route 27, and the blue is called Blue Skies. it is a Beautiful muted Blue colour.
All these colours has a slight sheen to them, not sparkly, which I REALLY LIKE...

The top blush colour is Hydrangea, the bottom is called Montauk Highway.
here's a picture of swatch on my hand under natural lighting. no FLASH. the colours stay pretty true to real life.

Here's a list of items I used for this FOTD:
- Estee Lauder Double Wear Light foundation
- Cezanne pink case powder foundation to set the foundation
- Lavschuca eye brow set
- Canmake brow mascara in 03
- Revlon colorburst in Mauve for lips
- Maquillage eyelash curler
- kiss me heroine mascara (volume & curl)

I used the Hydrangea colour from the Stila palette as blush. looks very similar to Mac's Fluer Power which I've been using nearly every day since I got it.

For eyes, I didn't exactly follow the instructions:
- Use Sand all over the lid as a base
- Use Linen over eye lid to give that bit more golden colour
- Use Route 27 within the crease across the eyelid
- Use Blue skies in the outter corner give that extra bit pop of colour.

I tried using the blue skies under the eyes, find it a bit too dark. I was going for a more natural look. may be next look should be a more heavier eye look with eyeliners as well.


This is what it looks like with eyes open
Hope you can see the colours from this picture above.
The blush colour looks quite natural.
And this is final look and hope you all like it.

Hope every one have a great weekend...